Note
Access to this page requires authorization. You can try signing in or changing directories.
Access to this page requires authorization. You can try changing directories.
In this quickstart, you use the PostgreSQL extension for Visual Studio Code to connect to a PostgreSQL server, create a table, insert rows, and run a query, all from inside VS Code.
What you'll learn
- Open the connection dialog and connect to a PostgreSQL server
- Create a database and a table with the query editor
- Insert and query data
- View results in the Results panel
Prerequisites
Before you begin, make sure you have the following:
- Visual Studio Code installed.
- The PostgreSQL extension for Visual Studio Code installed from the Extensions Marketplace.
- Access to a running PostgreSQL server. You can use a local installation, a Docker container, or any on-premises or cloud-provided PostgreSQL instance.
Connect to a server
Open the PostgreSQL view by pressing Ctrl+Alt+D (Windows/Linux) or Cmd+Alt+D (macOS), or select the PostgreSQL icon in the Activity Bar.
Hover over the Connections section header and select Add New Connection (the + icon). The connection dialog opens with the Parameters tab selected.
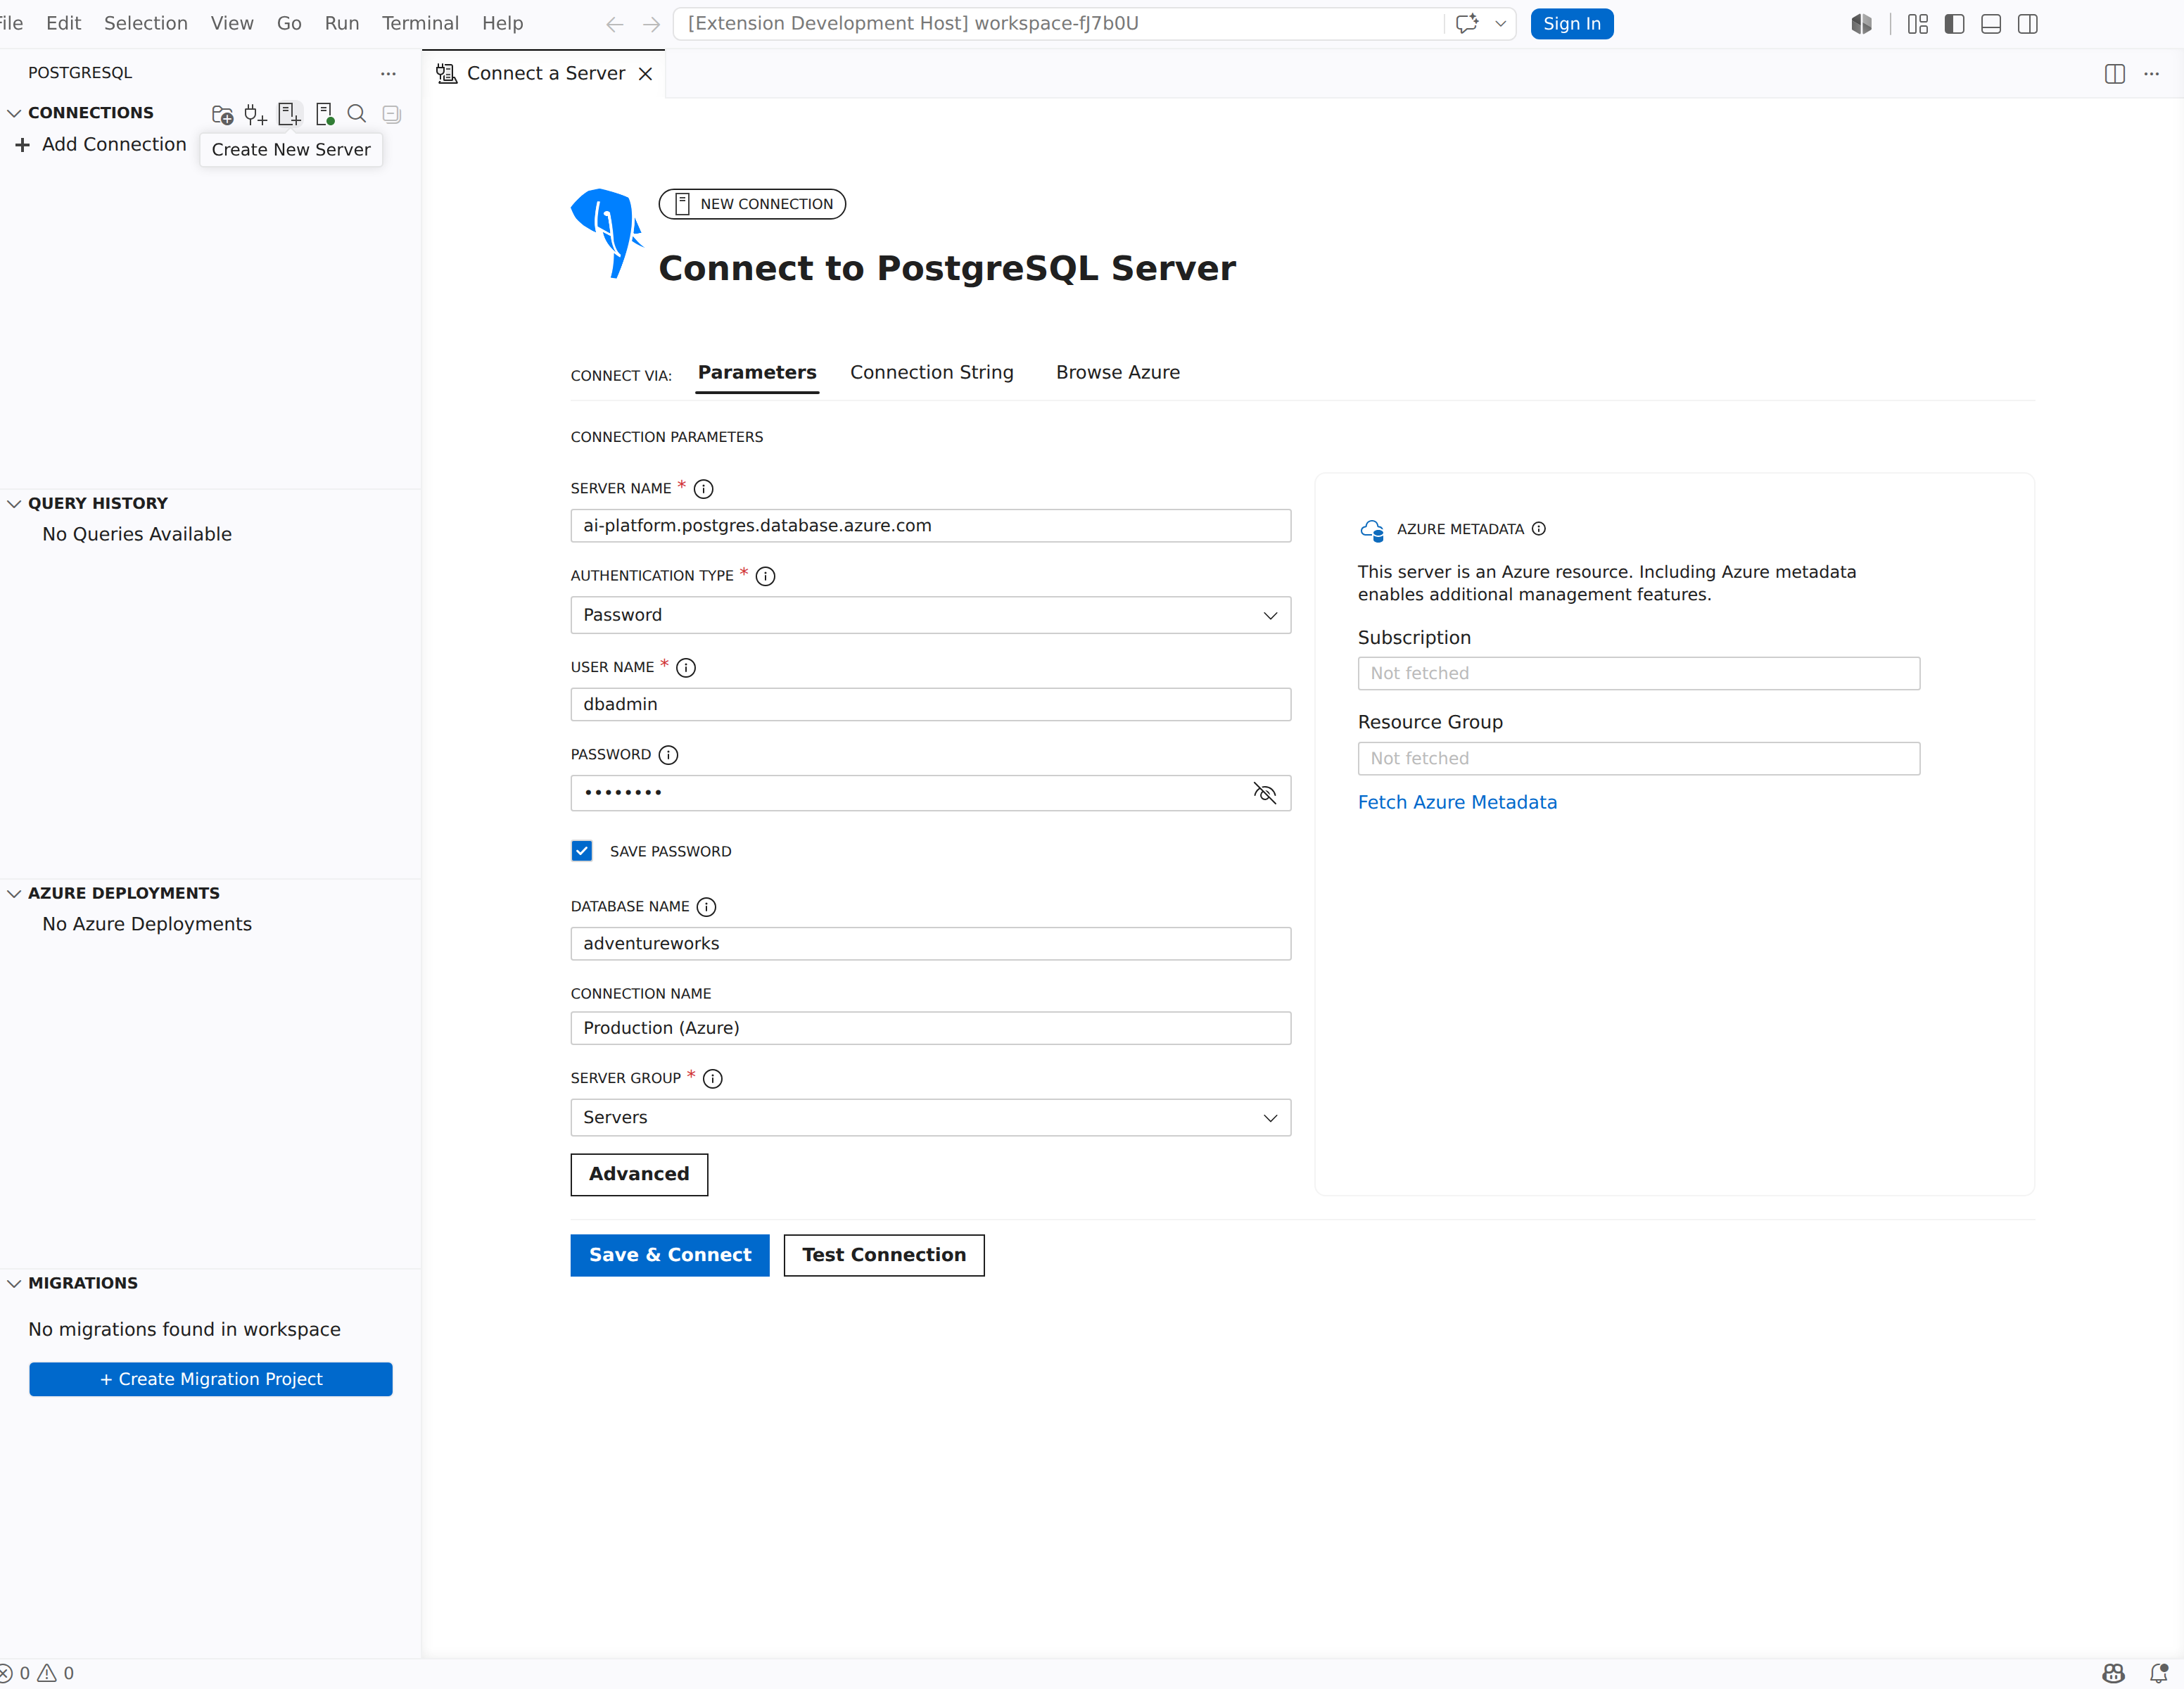
Fill in the connection fields for your PostgreSQL server:
Field Example value Description Server name localhostThe hostname or IP address of the server. Authentication Type Password Choose Password, Entra Auth, AWS IAM (RDS/Aurora), or None. User name postgresYour PostgreSQL login. Password (your password) The password for the account. Database name postgresThe database to connect to. Connection Name Local dev serverAn optional display name for this connection. Tip
Select Save Password to store the password securely in the VS Code credential store so you aren't prompted on every connection. For Microsoft Entra ID authentication, AWS IAM authentication, or other identity setup, see Connections and identity.
Select Save & Connect.
The server appears in the Connections tree with a green status indicator when the connection succeeds.

Create a database
Right-click on your server node in the Connections tree and select New Query. A query editor opens that is connected to the server.
Paste the following statement and press Ctrl+Shift+E (Windows/Linux) or Cmd+Shift+E (macOS) to run it:
CREATE DATABASE tutorialdb;Right-click the server node in the Connections tree and select Refresh to see the new tutorialdb database in the tree.
Create a table
Change the database context to tutorialdb. Use the database dropdown list in the query editor toolbar, or run
pgsql.changeDatabasefrom the Command Palette (Change PostgreSQL Database) and select tutorialdb.Paste the following statement into the query editor and run it with Ctrl+Shift+E / Cmd+Shift+E:
CREATE TABLE customers (
    id SERIAL PRIMARY KEY,
    name VARCHAR(50) NOT NULL,
    email VARCHAR(50) NOT NULL,
    city VARCHAR(50)
);
The Messages panel confirms the statement completed successfully.
Insert data
Replace the contents of the query editor with the following statement and run it:
INSERT INTO customers (name, email, city)
VALUES
    ('Alice Johnson', 'alice@example.com', 'Seattle'),
    ('Bob Smith', 'bob@example.com', 'Portland'),
    ('Carol Williams', 'carol@example.com', 'San Francisco');
The Messages panel confirms that three rows were inserted.
Query the data
Replace the contents of the query editor with the following statement and run it:
SELECT * FROM customers;
The Results panel displays the three rows you inserted.


Verify the result
To confirm the data is persisted, run a filtered query:
SELECT name, city
FROM customers
WHERE city = 'Seattle';
The Results panel returns one row for Alice Johnson in Seattle.
Troubleshoot connection issues
If you can't connect to the server, check the following common causes:
- Connection refused: Verify that PostgreSQL is running and listening on the expected host and port. For local servers, confirm the service is started.
- Password authentication failed: Double-check the User name and Password values. Review the server's
pg_hba.conffile to confirm the authentication method allows your connection. - SSL errors: Configure SSL settings in the advanced connection options. For details, see Connections and identity: SSL and TLS.