Note
Access to this page requires authorization. You can try signing in or changing directories.
Access to this page requires authorization. You can try changing directories.
Note
Community interest groups have now moved from Yammer to Microsoft Viva Engage. To join a Viva Engage community and take part in the latest discussions, fill out the Request access to Finance and Operations Viva Engage Community form and choose the community you want to join.
To use the Electronic reporting (ER) framework to import data from manually selected inbound files in batch mode, configure an ER format that supports the import. Then run a model mapping of the To destination type that uses that format as a data source. To import data, browse to the file that you want to import, and manually select it.
The new ER capability that supports data import in batch mode enables you to configure this process as unattended. You can use ER configurations to perform data import by scheduling a new batch job from the ER user interface (UI).
This article explains how to complete data import from a manually selected file in batch mode. The examples use vendor transactions as business data. You can complete the steps of these examples in the USMF company. No coding is required.
Prerequisites
To complete the examples in this article, you must have the following access:
One of the following roles:
- Electronic reporting developer
- Electronic reporting functional consultant
- System administrator
ER format and model configurations for 1099 payments
Create the required ER configurations
To create the required ER configurations and obtain other prerequisites, follow one of these steps:
- Play the ER Import data from a Microsoft Excel file task guides, which are part of the 7.5.4.3 Acquire/Develop IT service/solution components (10677) business process. These task guides walk you through the process of designing and using ER configurations that interactively import vendor transactions from Microsoft Excel files. For more information, see Parse incoming documents in Excel format.
- Complete the examples in Configure data import from SharePoint. These examples walk you through the process of designing and using ER configurations that interactively import vendor transactions from Excel files that are stored in a SharePoint folder.
Download the required ER configurations
Download the following ER configurations, and save them locally.
Content description File 1099 Payments model ER data model configuration 1099model.xml For importing vendors' transactions (Excel) ER format configuration 1099format-import-from-excel.xml Use the Load from XML file ER option to import the downloaded ER configurations into your instance of Dynamics 365 Finance in the following order:
- ER data model configuration
- ER format configuration
Download the required Excel files
Download the following sample data set, and save it locally.
Content description File Inbound 1099import-data.xlsx file that contains sample data for import 1099import-data.xlsx
Review the prerequisites
Go to Organization administration > Electronic reporting > Configurations.
On Configurations, review the prepared ER solution for data import in batch mode.
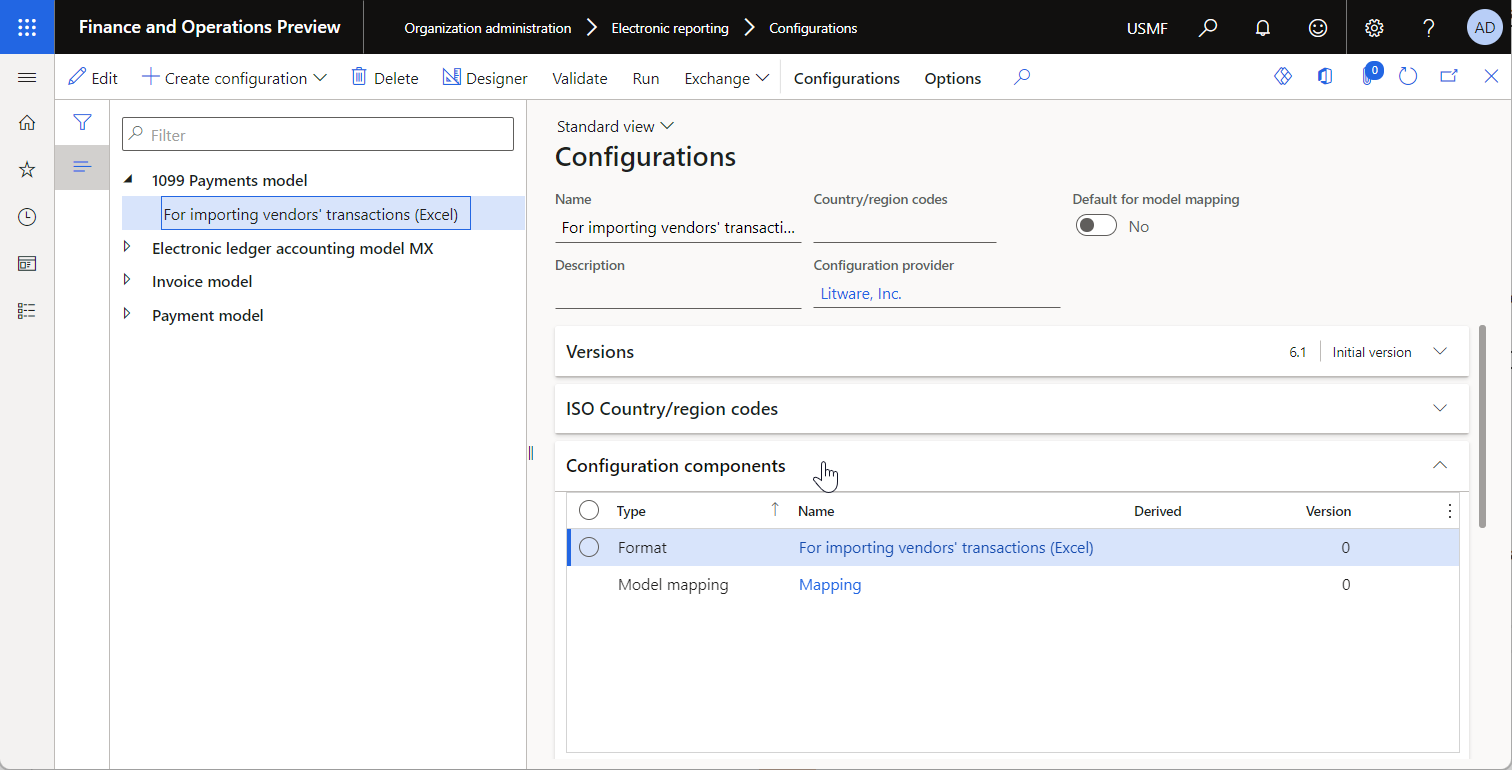
Review the For importing vendors' transactions (Excel) format configuration.
- The format component of this configuration is designed to parse an inbound Excel file.
- The model mapping component of this configuration is used to fill in the base data model by using data from the parsed Excel file.
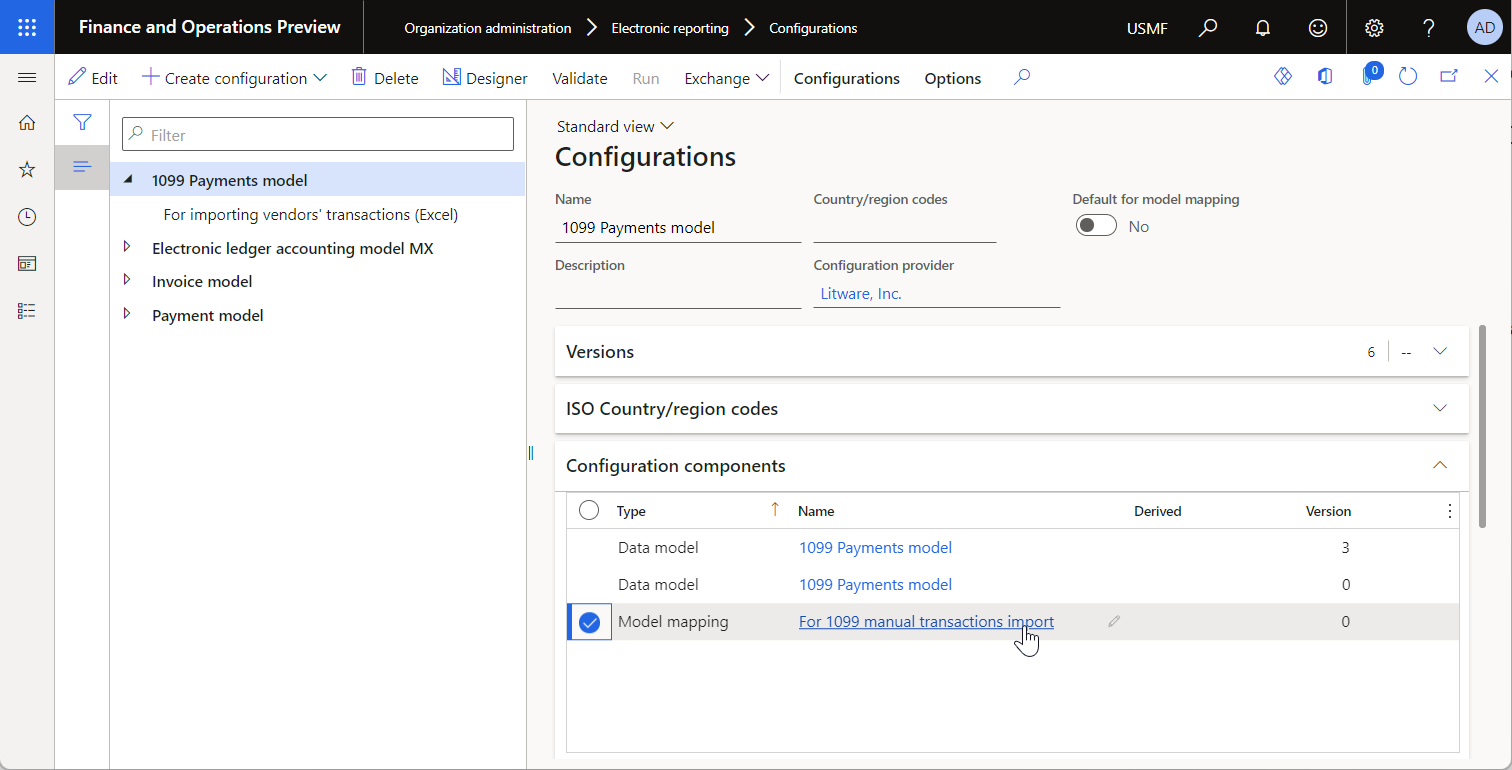
Review the 1099 Payments model data model configuration.
- The model component of this configuration represents the structure of the data model that is used to pass data between running ER components.
- The model mapping component of this configuration is used to pull data from the executed format component and then update application tables.
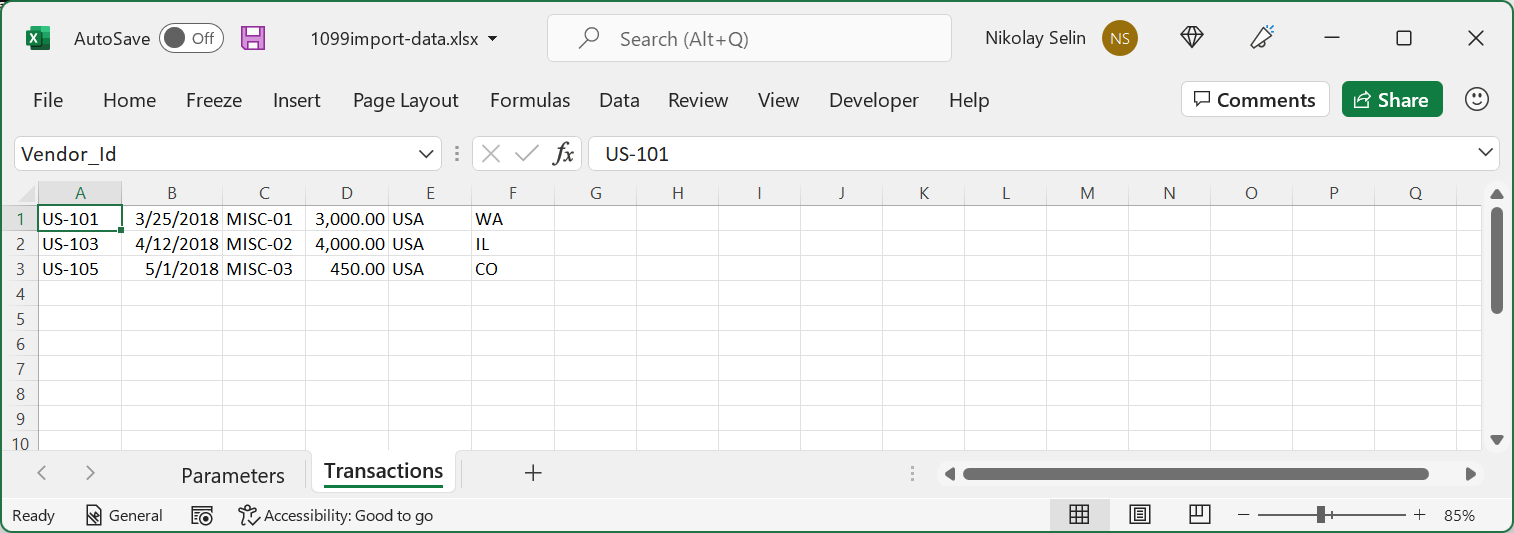
Open the 1099import-data.xlsx file in Excel.
Enable batch data import for ER from the UI
- Go to System administration > Workspaces > Feature management.
- In Feature management, select the Run ER import of manually uploaded documents in batch feature, and then select Enable now.
Import data from manually selected Excel files
Go to Organization administration > Electronic reporting > Configurations.
On Configurations, select the 1099 Payments model data model configuration.
On the Configuration components FastTab, select the For 1099 manual transactions import link.
On Model to datasource mapping, the For 1099 manual transactions import model mapping is preselected. Select Run.
On the Parameters tab, select Browse. Find and select the 1099import-data.xlsx file, and then select OK.
In the Enter voucher id field, enter V-00001.
On the Run in the background tab, set the Batch processing option to Yes.
Notice that the Task description field is set to Run of Model mapping 'For 1099 manual transactions import', configuration '1099 Payments model'. This value indicates that the execution of the selected model mapping is scheduled as a new batch job.
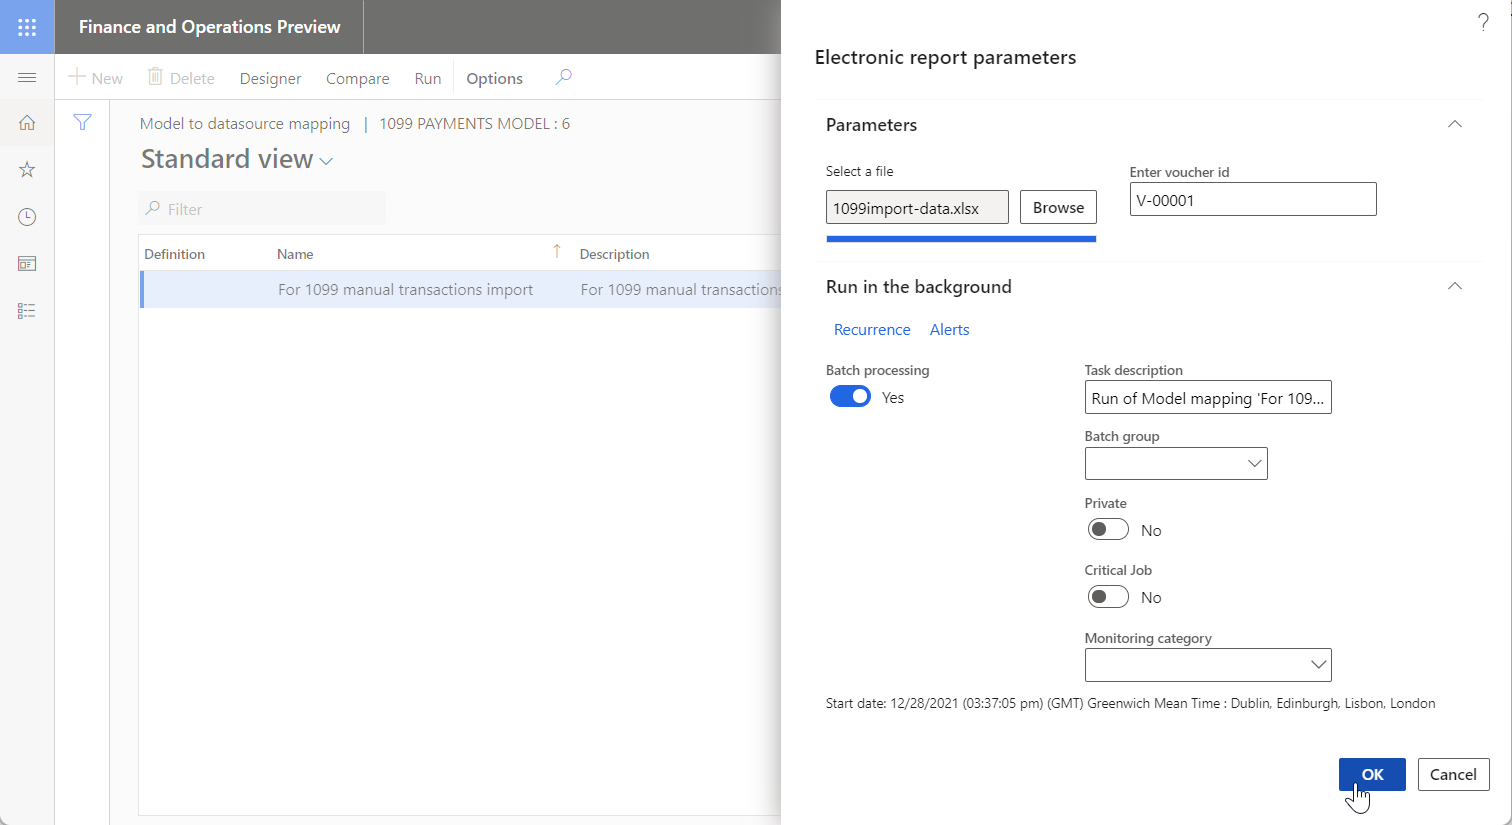
Select OK. A message notifies you that a new batch job is scheduled.

Review the data import results on the Batch job page
Go to Common > Inquiries > Batch jobs > My batch jobs.
On the Batch job page, filter the list of batch jobs to find the scheduled batch, and then select it.
Select the Job ID link to review job details.
On the Batch tasks FastTab, select Log.

Review the execution details.

Change the data import parameters
After your batch is scheduled but before it runs, you can change the parameters of the scheduled data import.
Go to Common > Inquiries > Batch jobs > My batch jobs.
On the Batch job page, filter the list of batch jobs to find the scheduled batch, and then select it.
Select Change status.
In the Select new status dialog box, select Withhold, and then select OK.
Select the Job ID link to access the job details.
On the Batch tasks FastTab, select Parameters.
In the Electronic report parameters dialog box, follow these steps:
Select Browse to select the alternative file for data import.
Select Enter voucher id to change the voucher number for importing vendor transactions.

Select OK.
Make sure that the batch is still selected, and then select Change status again.
In the Select new status dialog box, select Waiting, and then select OK.
Review the data import results on the ER source page
Go to Organization administration > Electronic reporting > Electronic reporting source.
Select the For importing vendors' transactions (Excel) record. This record is created automatically during the data import.
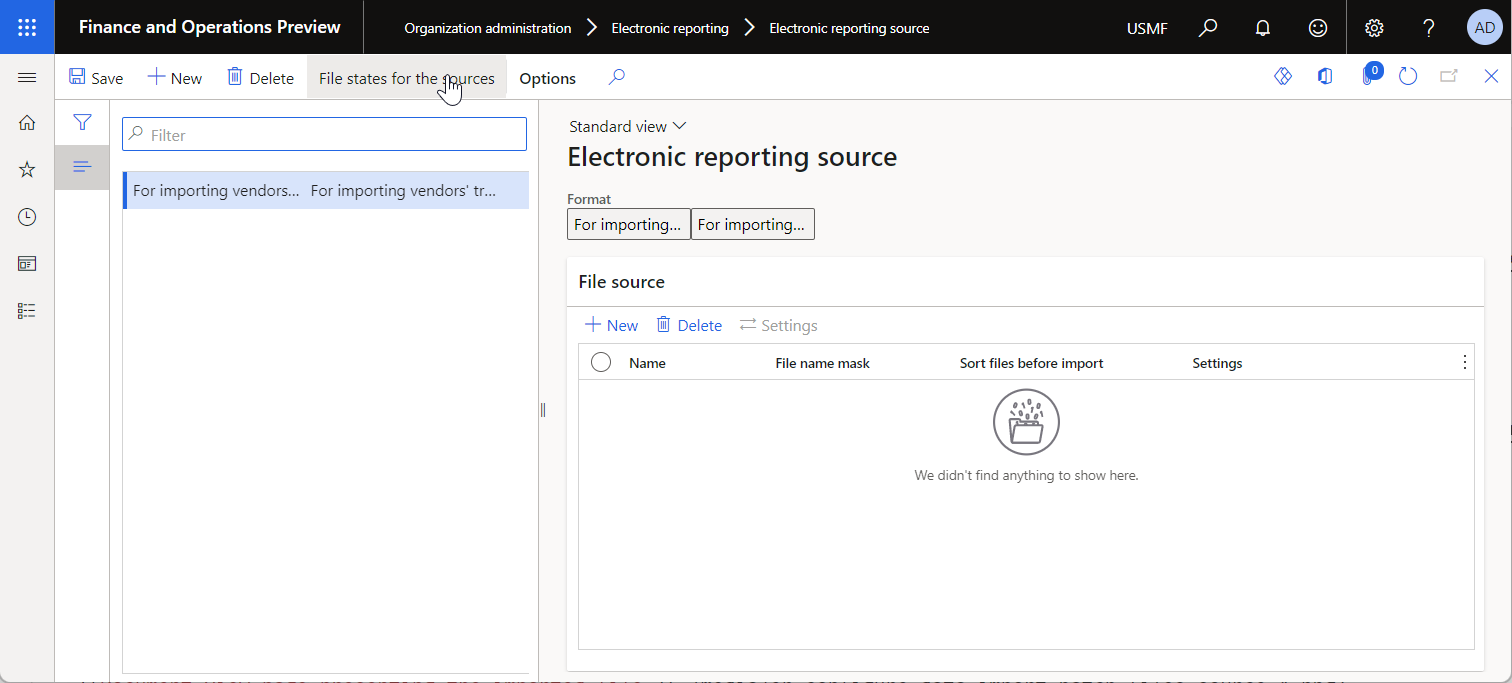
Select File states for the sources.
On the Files and Source logs for the import format FastTabs, review the import details.
On the Files FastTab, select the record. The imported file is attached to this record.
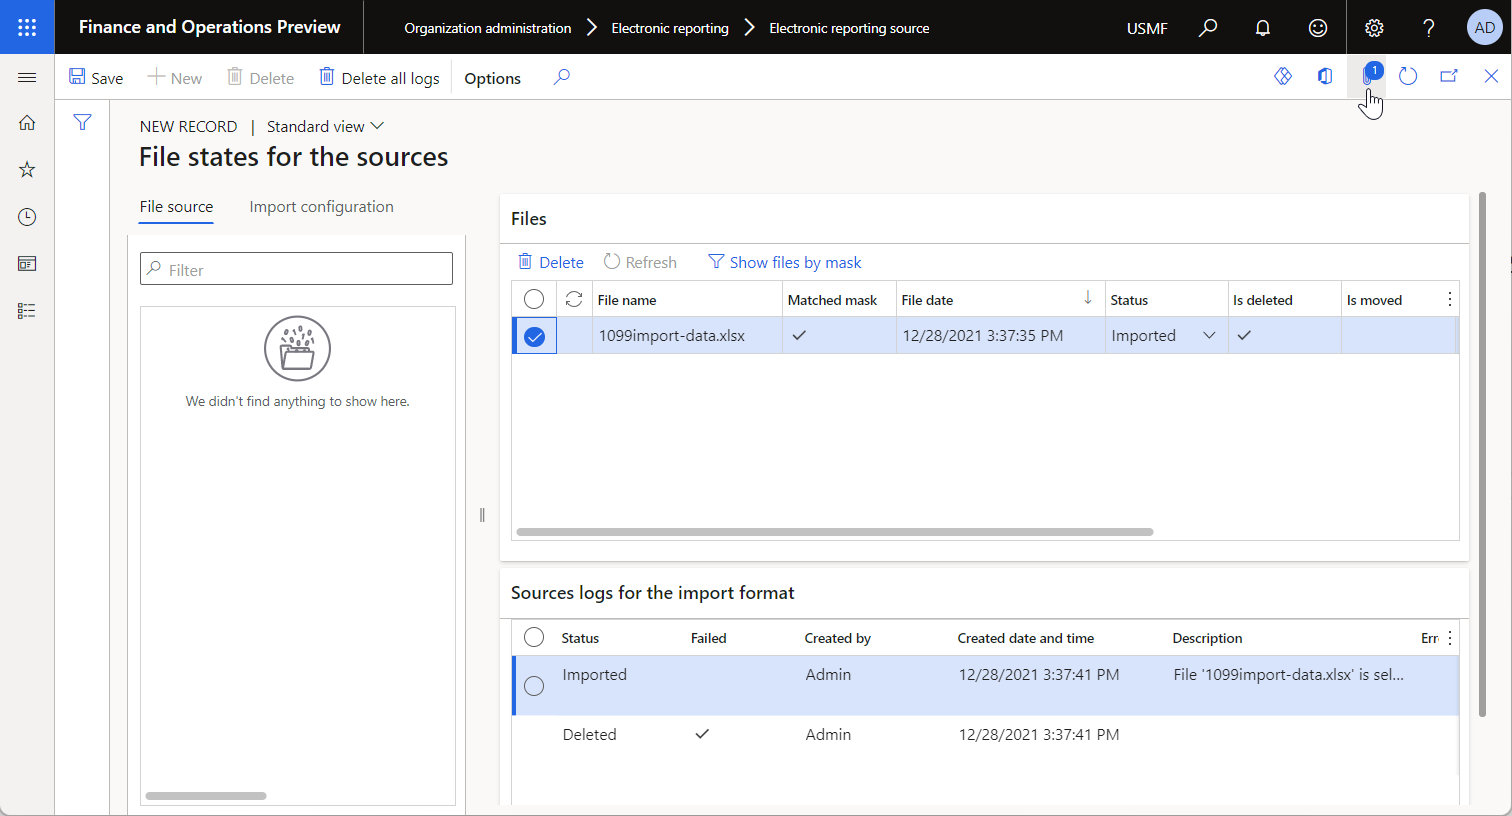
Select Attachments to review the imported file.
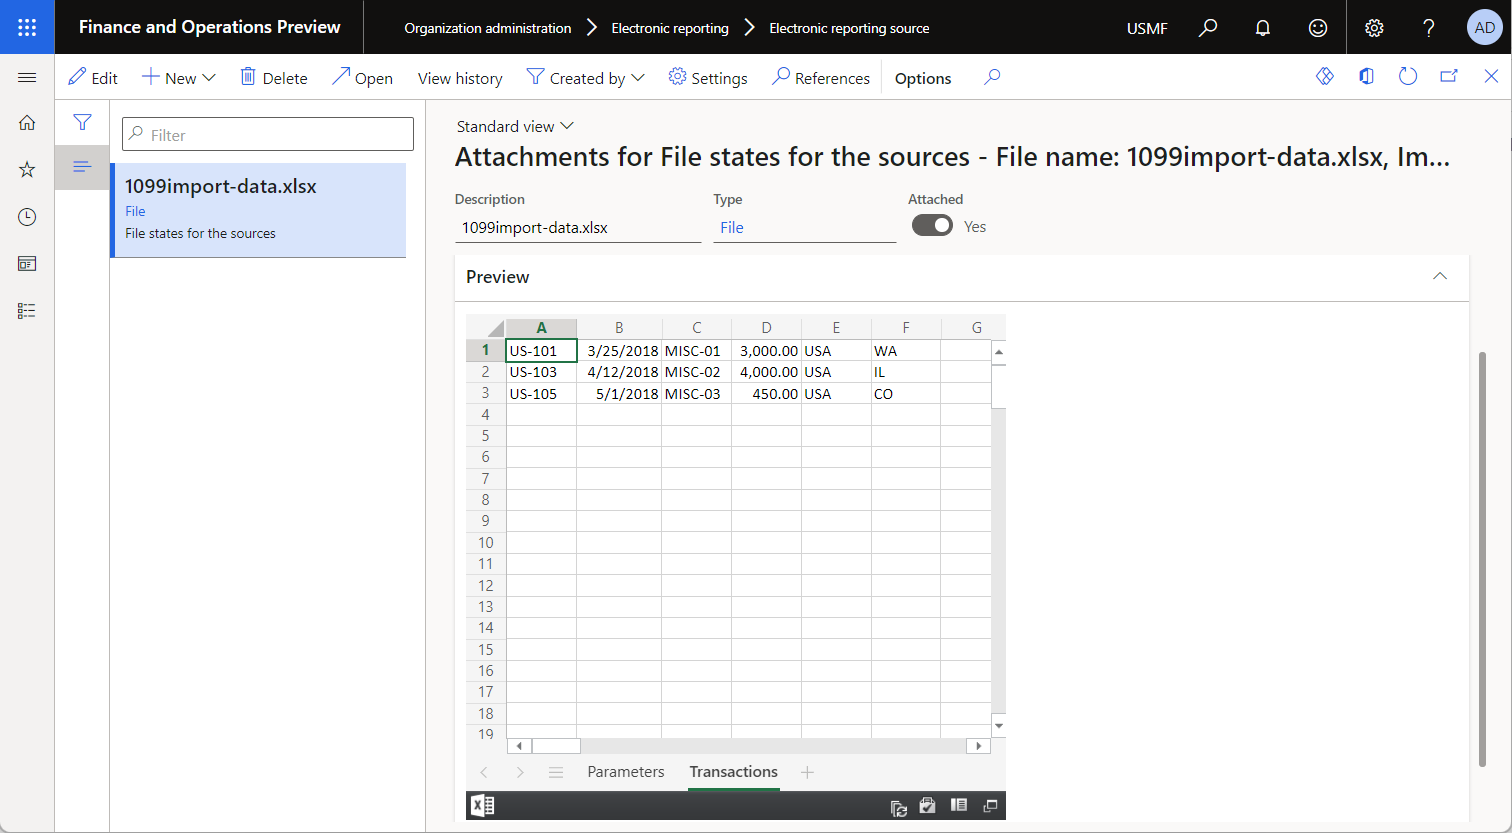
Tip
To keep these attachments, the ER framework uses a document type that is set for the current company in the Others field of the ER parameters.
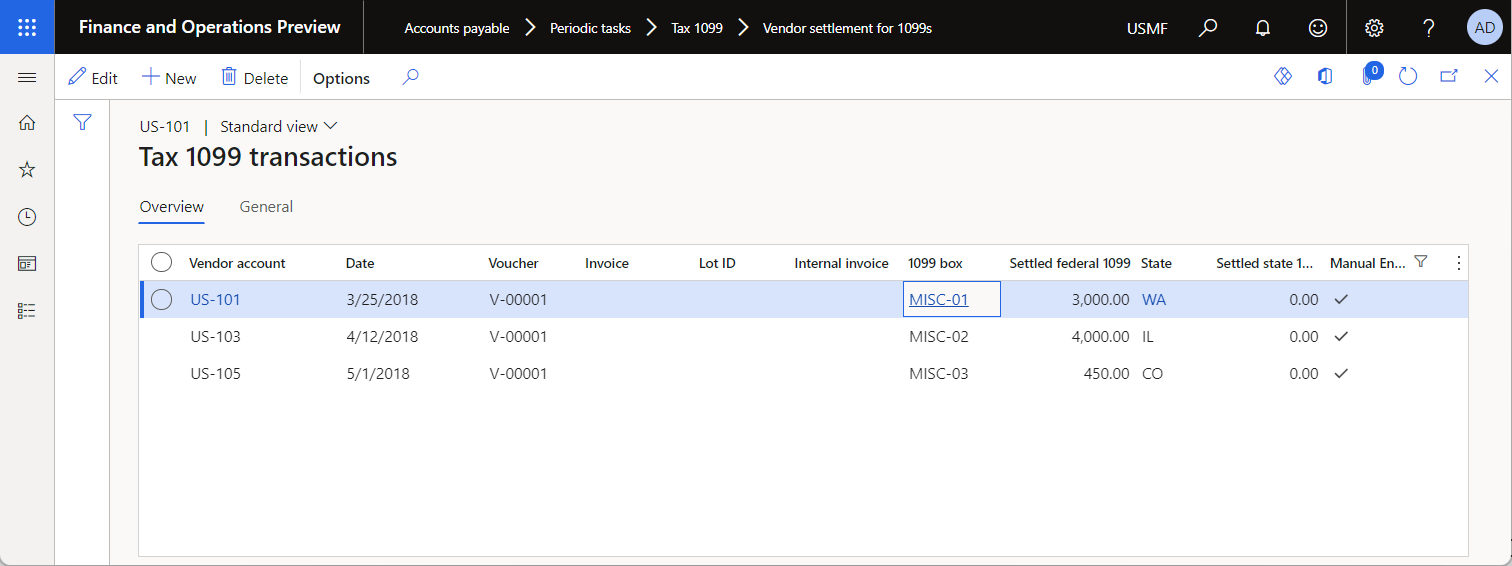
Review the data import results on the Vendor settlement for 1099s page
Go to Accounts payable > Periodic tasks > Tax 1099 > Vendor settlement for 1099s.
In the From date field, enter 12/31/2017 (December 31, 2017).
Select Manual 1099 transactions.